
Campaign Settings — also called Advanced Settings or Outreach Settings — give you precise control over who your campaigns reach and when. They cover Inactive Days, Active Time Settings, Blacklists, and Attach Settings, and they can be defined at three levels: Agent, Sender, and Campaign.
👉 The golden rule: Only the settings applied inside the campaign itself are actually enforced. Agent and Sender settings are starting points; the campaign always wins.
How Settings Levels Work
Think of it like a pizza shop:
- Agent Settings are the default recipe every chef follows. New senders inherit these automatically.
- Sender Settings are a chef's personal tweaks. They apply to that sender's campaigns.
- Campaign Settings are the customer's final order. They override everything else.
The Three Levels
| Level | What it does |
|---|---|
| Agent | Default config applied to new senders and existing campaigns when attached |
| Sender | Per-sender config, applied when that sender is used in a campaign |
| Campaign | The active config that controls actual outreach. Always takes priority. |
Where to Access Advanced Settings
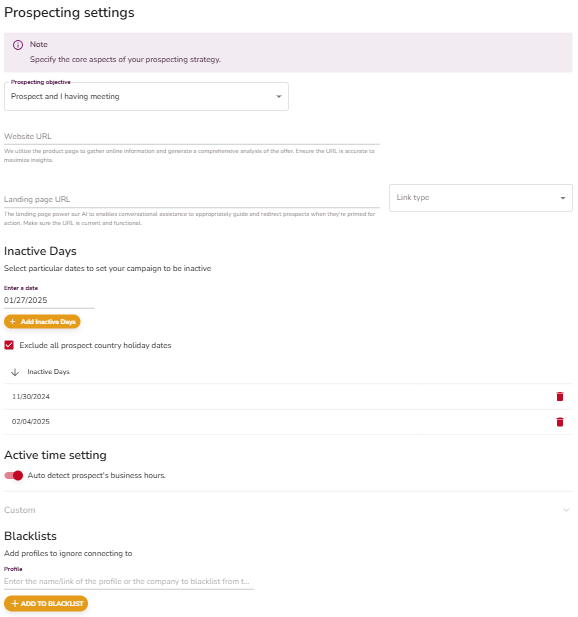
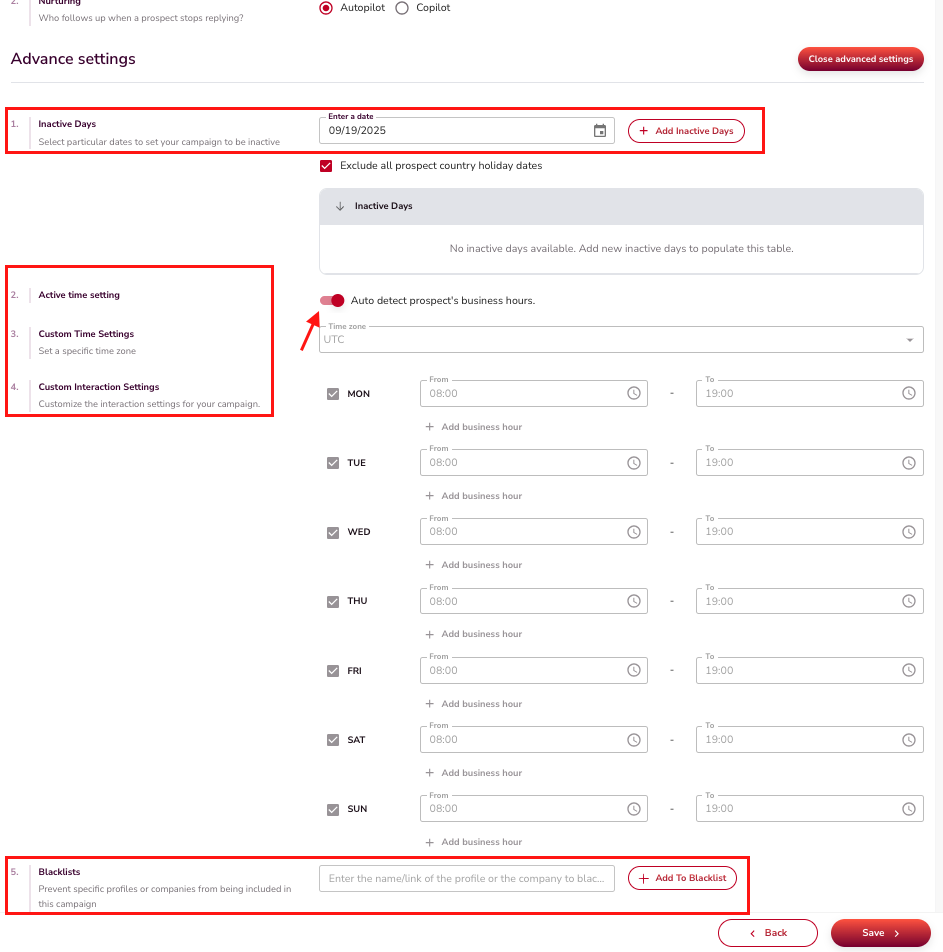
- From a Campaign: Campaign Creation → Prospect → Advanced Settings
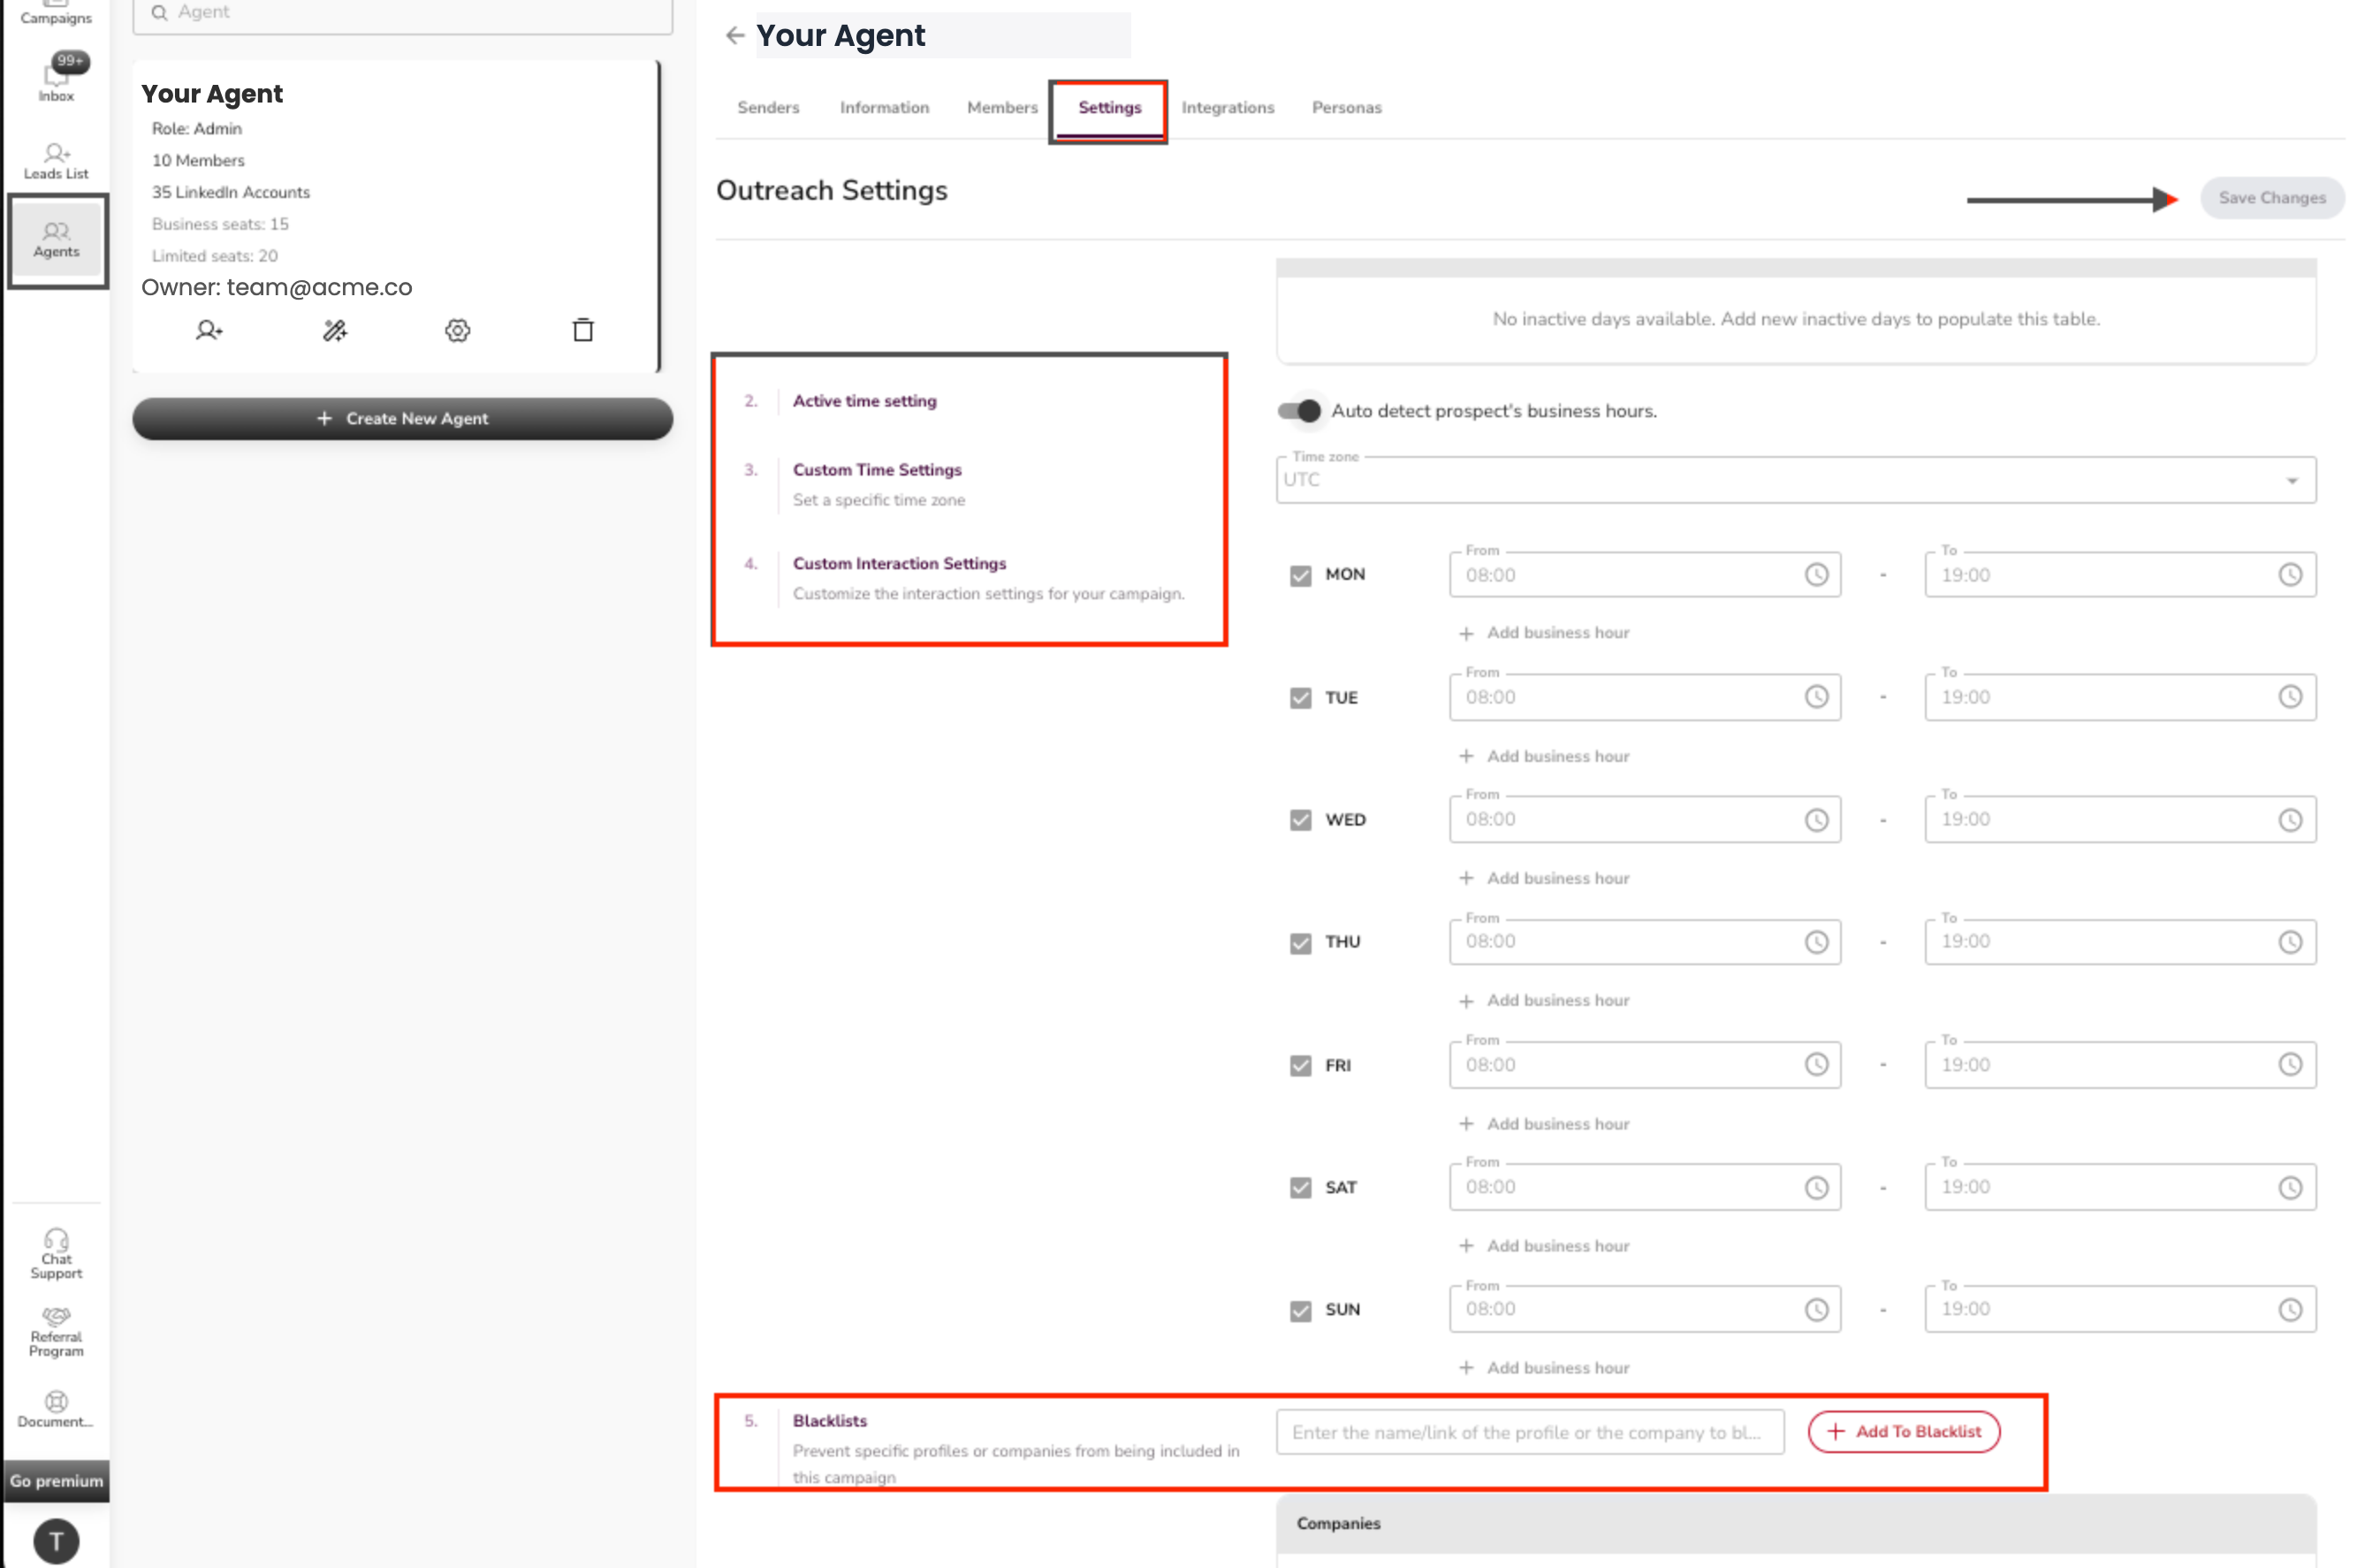
- From an Agent: Agent → Settings
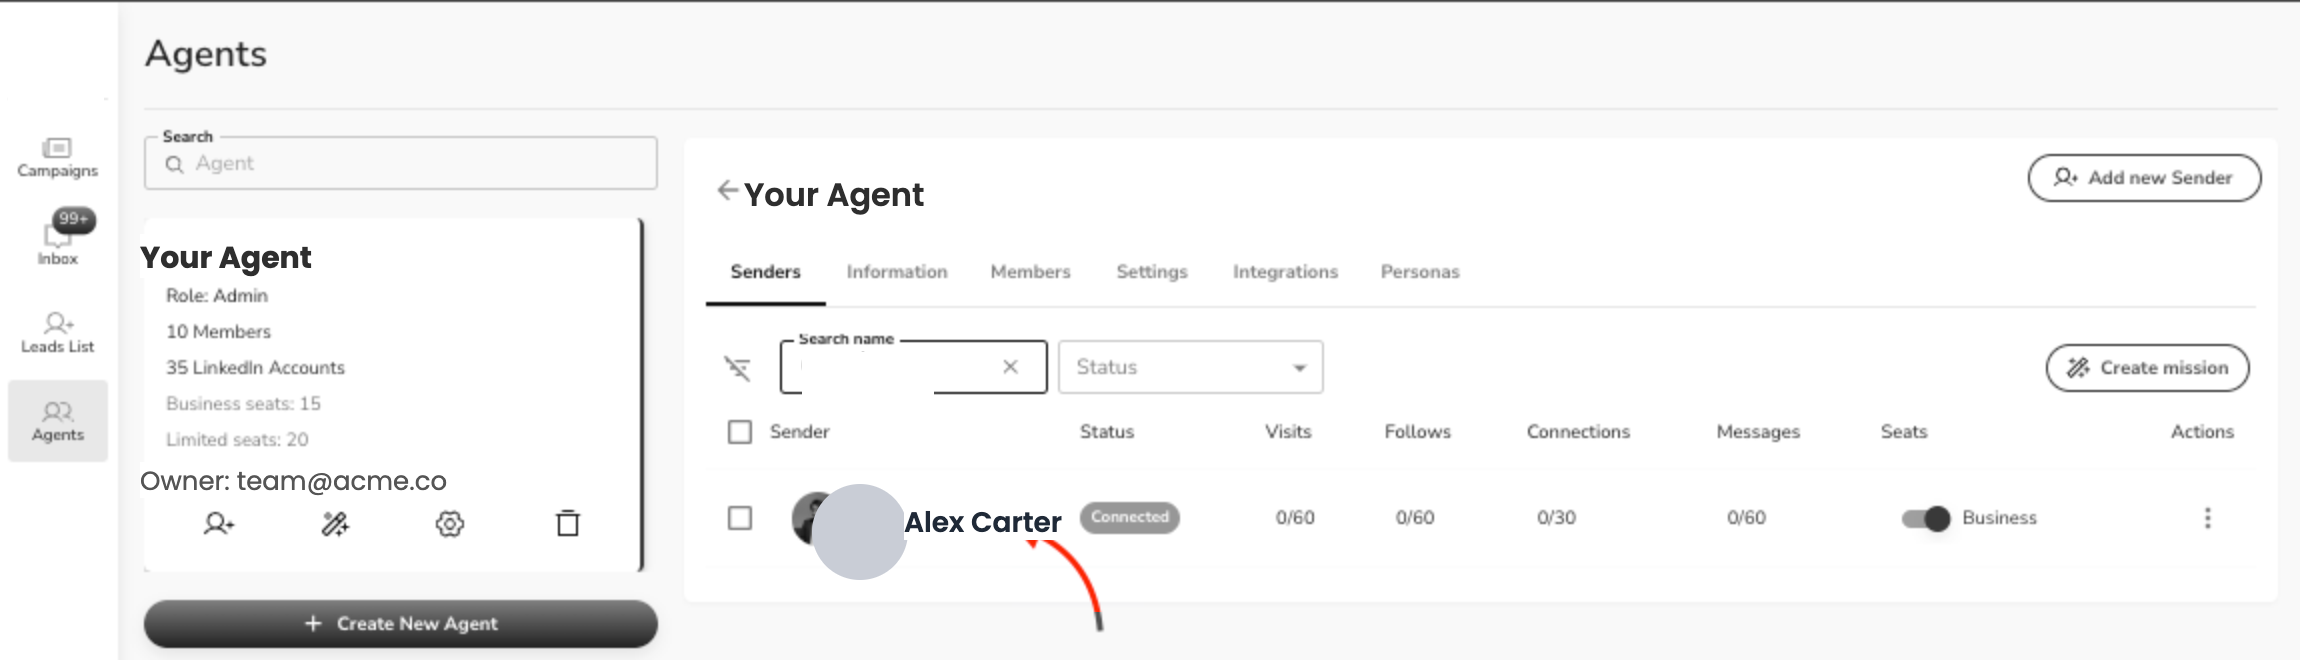
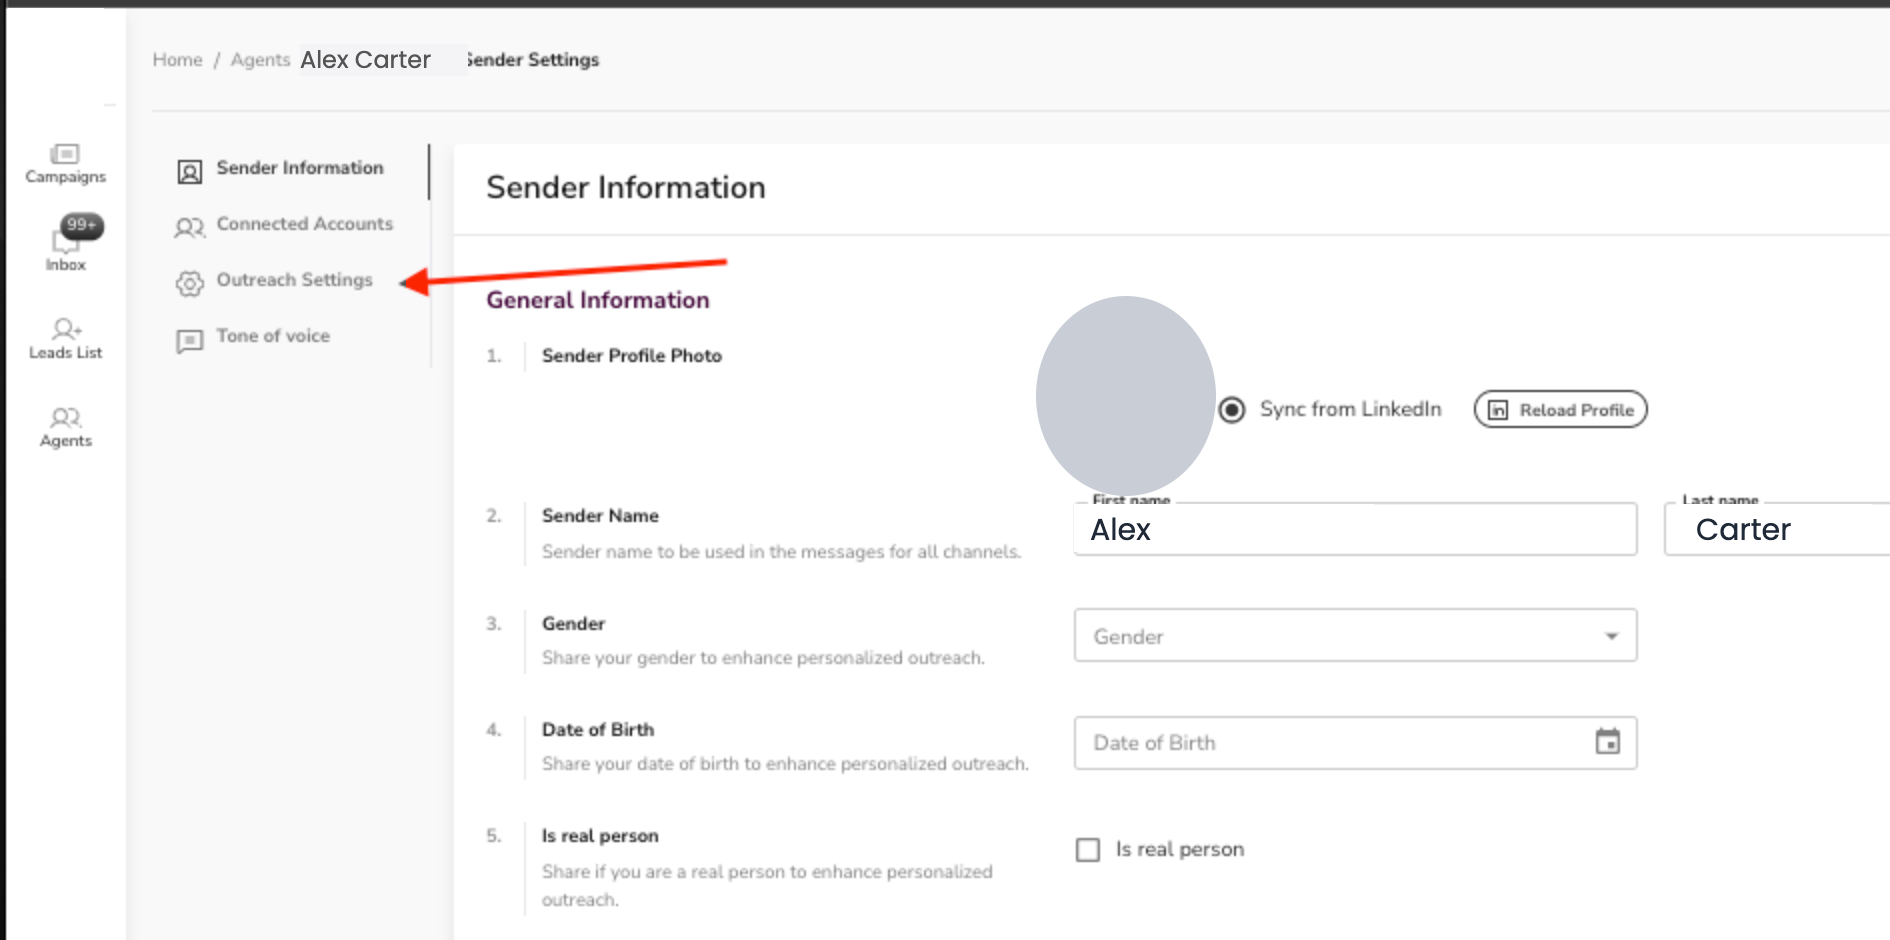
- From a Sender: Agent → Sender Settings → Outreach Settings
A Visual Tour of Each Level
Agent Level
Apply default settings across all senders created under the agent.
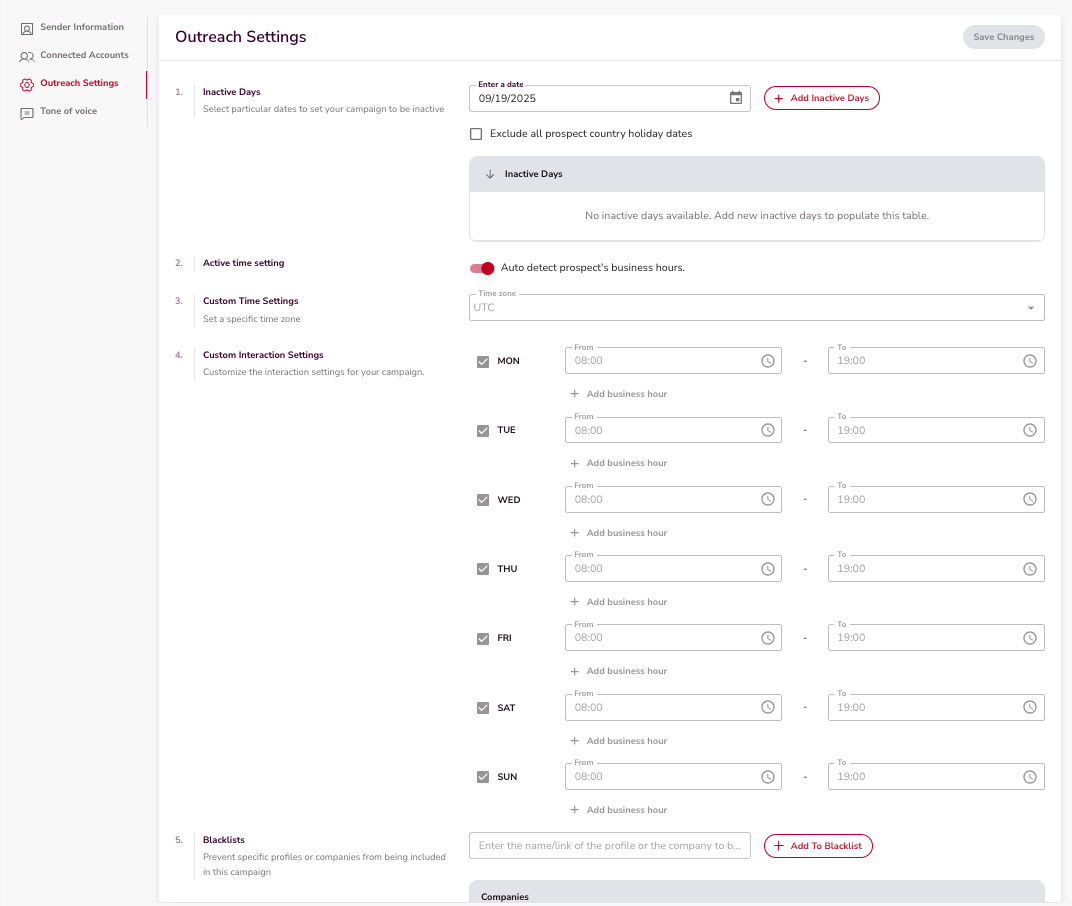
Sender Level
Each sender can have its own settings, which get applied when that sender is used in a campaign.
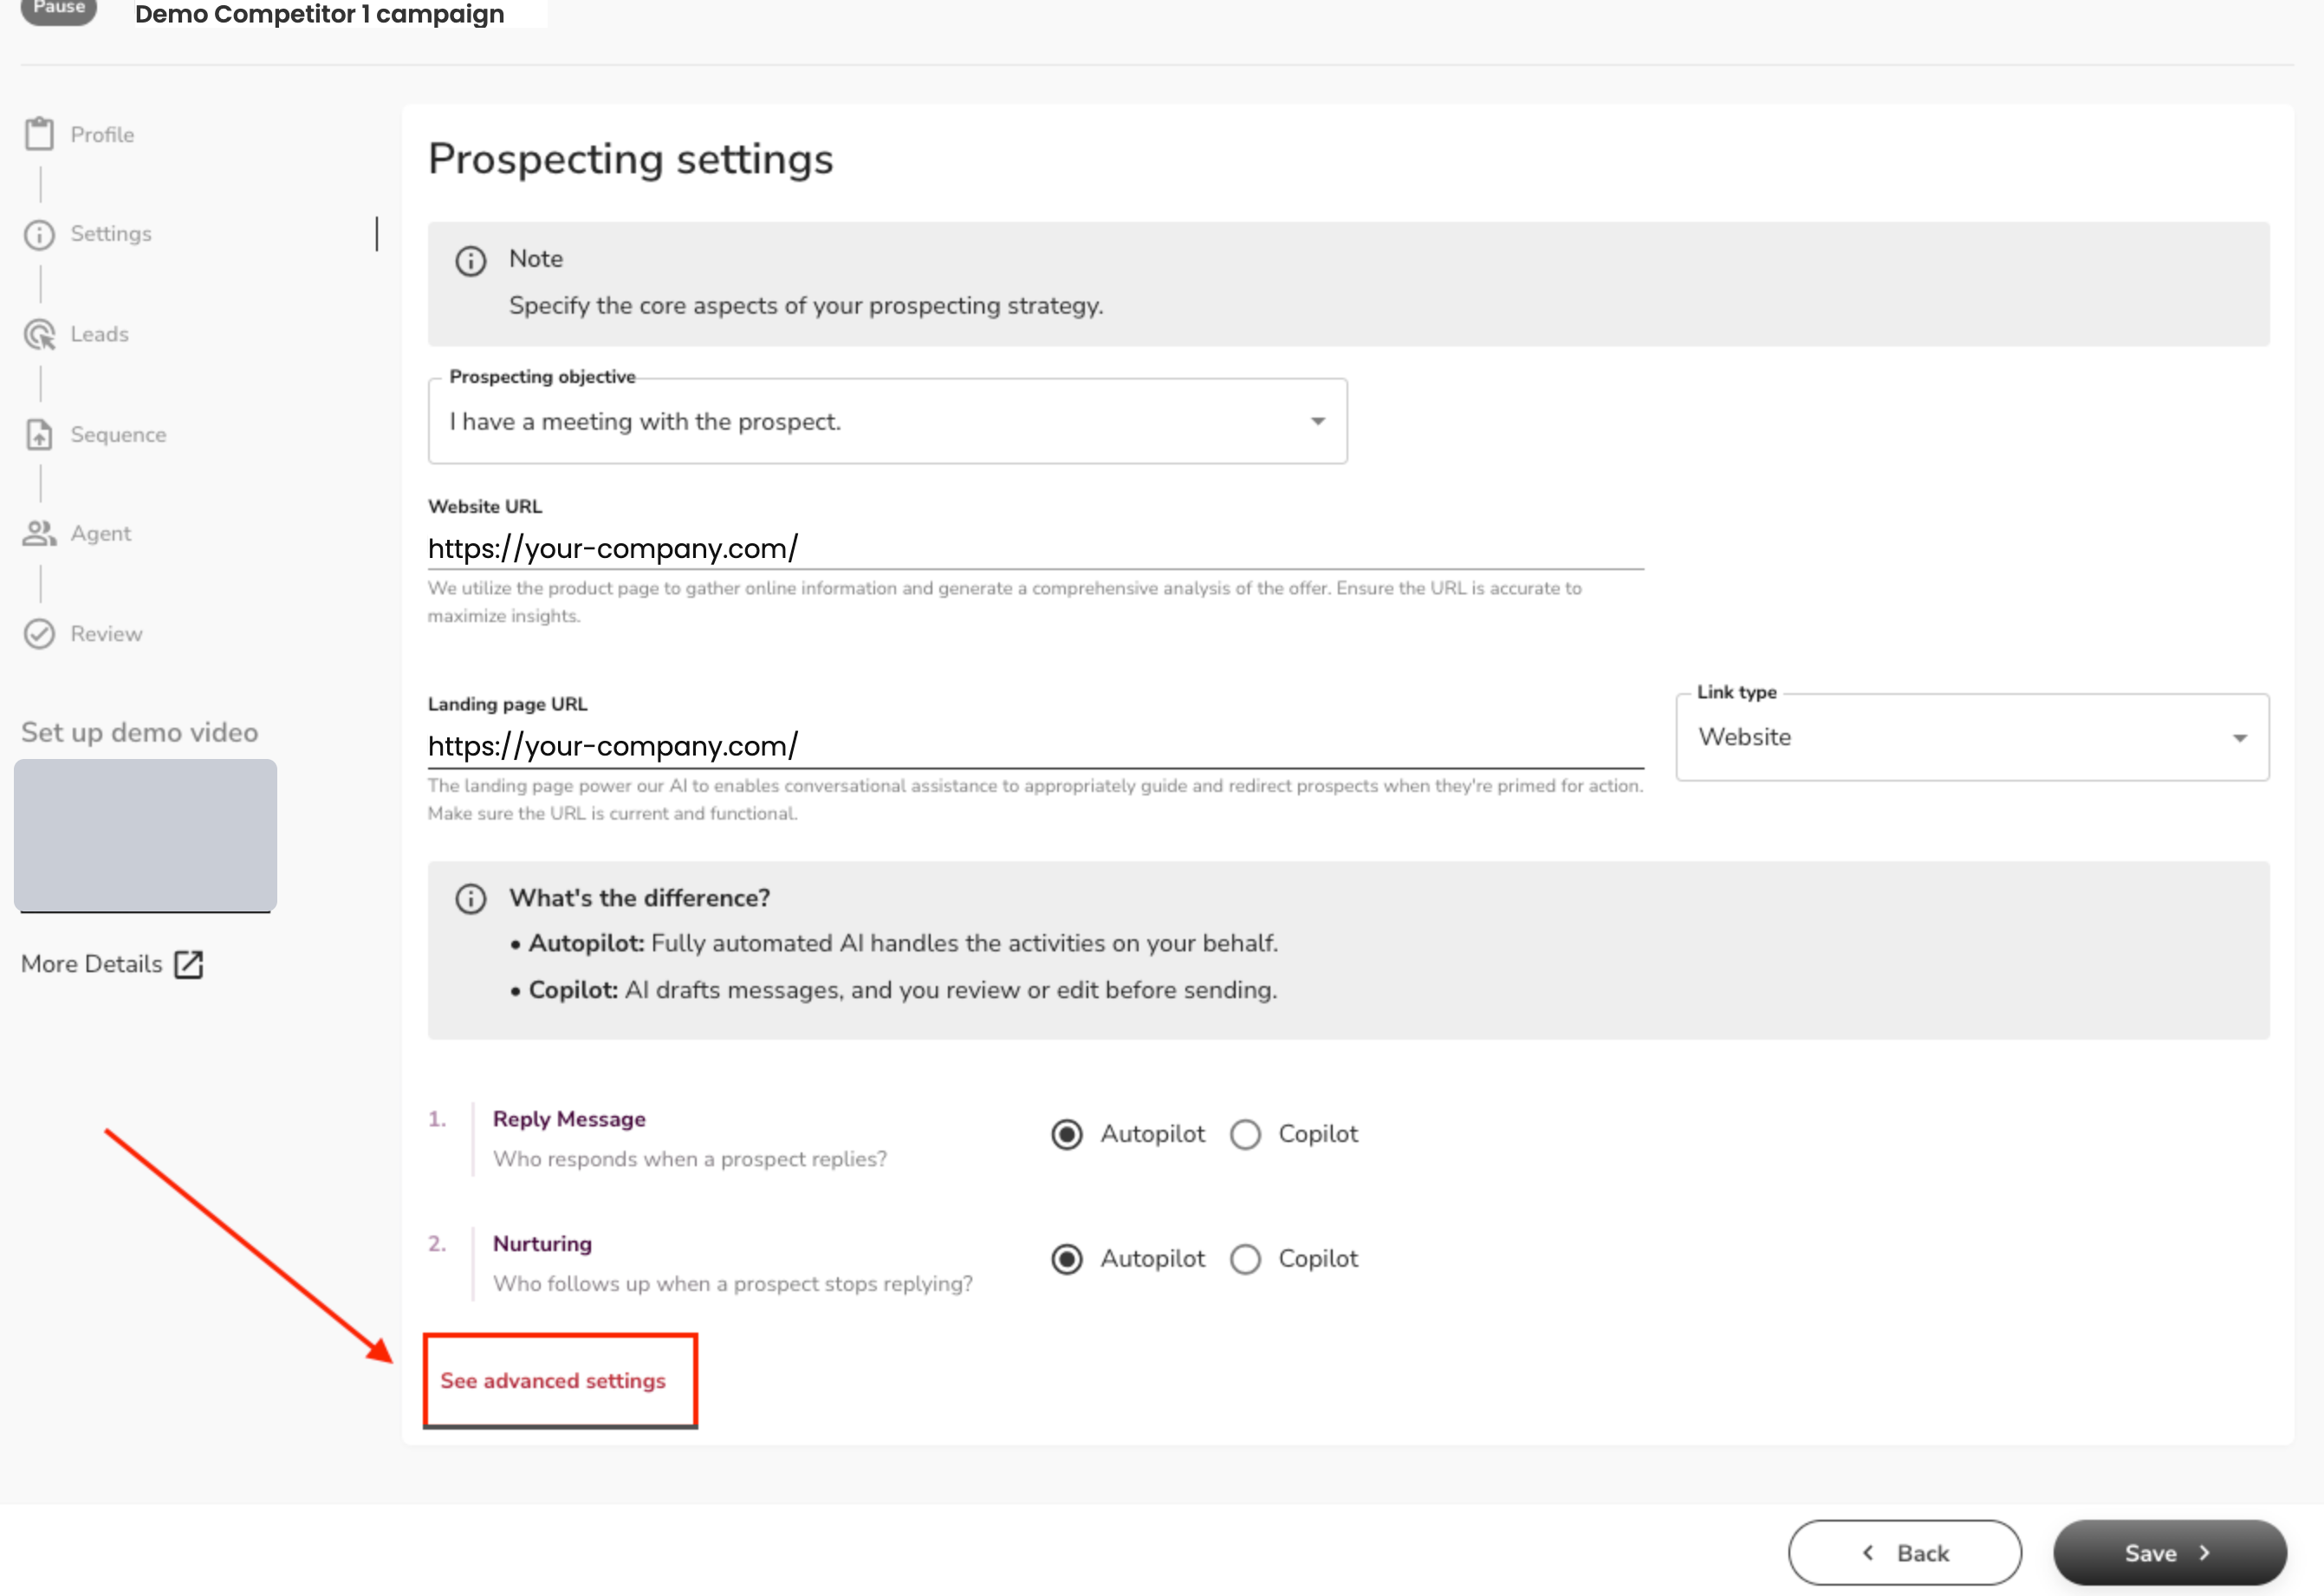
Campaign Level
The active settings that determine actual outreach. Only blacklist entries set here will stop outreach from going through.
Inactive Days
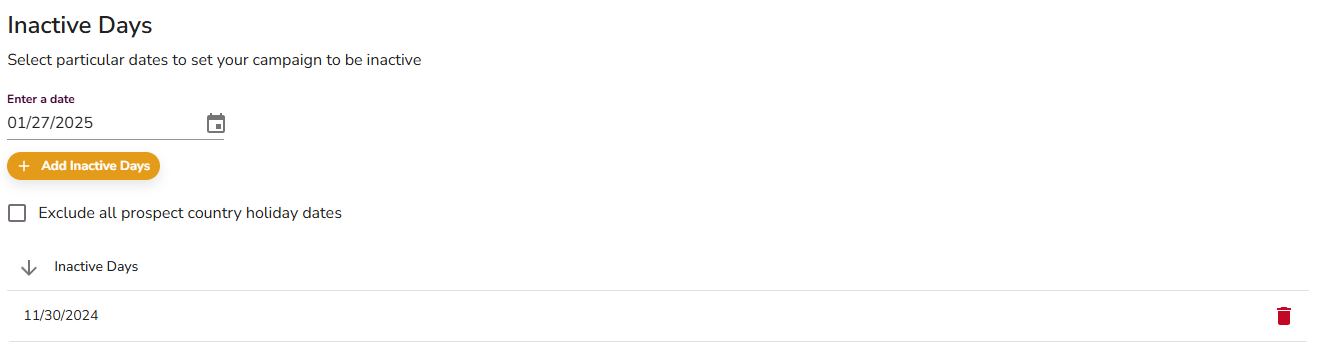
Inactive Days prevents outreach on non-business days and holidays, keeping your campaigns professional and well-timed.
What it does
- Automatically detects national holidays based on the prospect's country and pauses outreach.
- Lets you add custom dates like company-wide off days or weekends.
How to configure
- Open Advanced Settings.
- Go to the Inactive Days section.
- Select dates to mark as inactive.
- Enable prospect country holiday exclusions or add custom dates.
- Save.
Active Time Settings
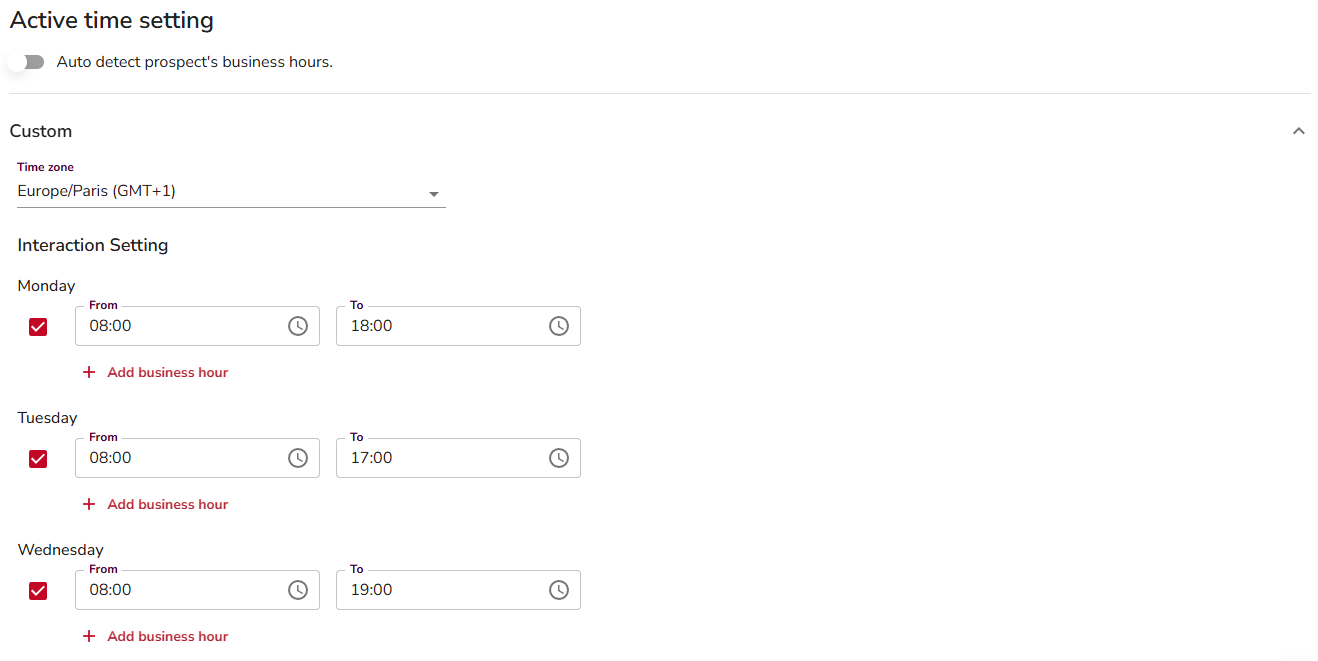
Active Time Settings controls the hours your campaign sends messages, so outreach lands when prospects are actually at their desks.
What it does
- AI Detection: Automatically aligns with prospects' local business hours.
- Manual Configuration: Set specific active hours based on your audience or timezone.
How to configure
- Open Advanced Settings.
- Go to the Active Time Settings section.
- Choose AI Detection to auto-detect business hours, or set hours manually.
- Save.
Blacklists
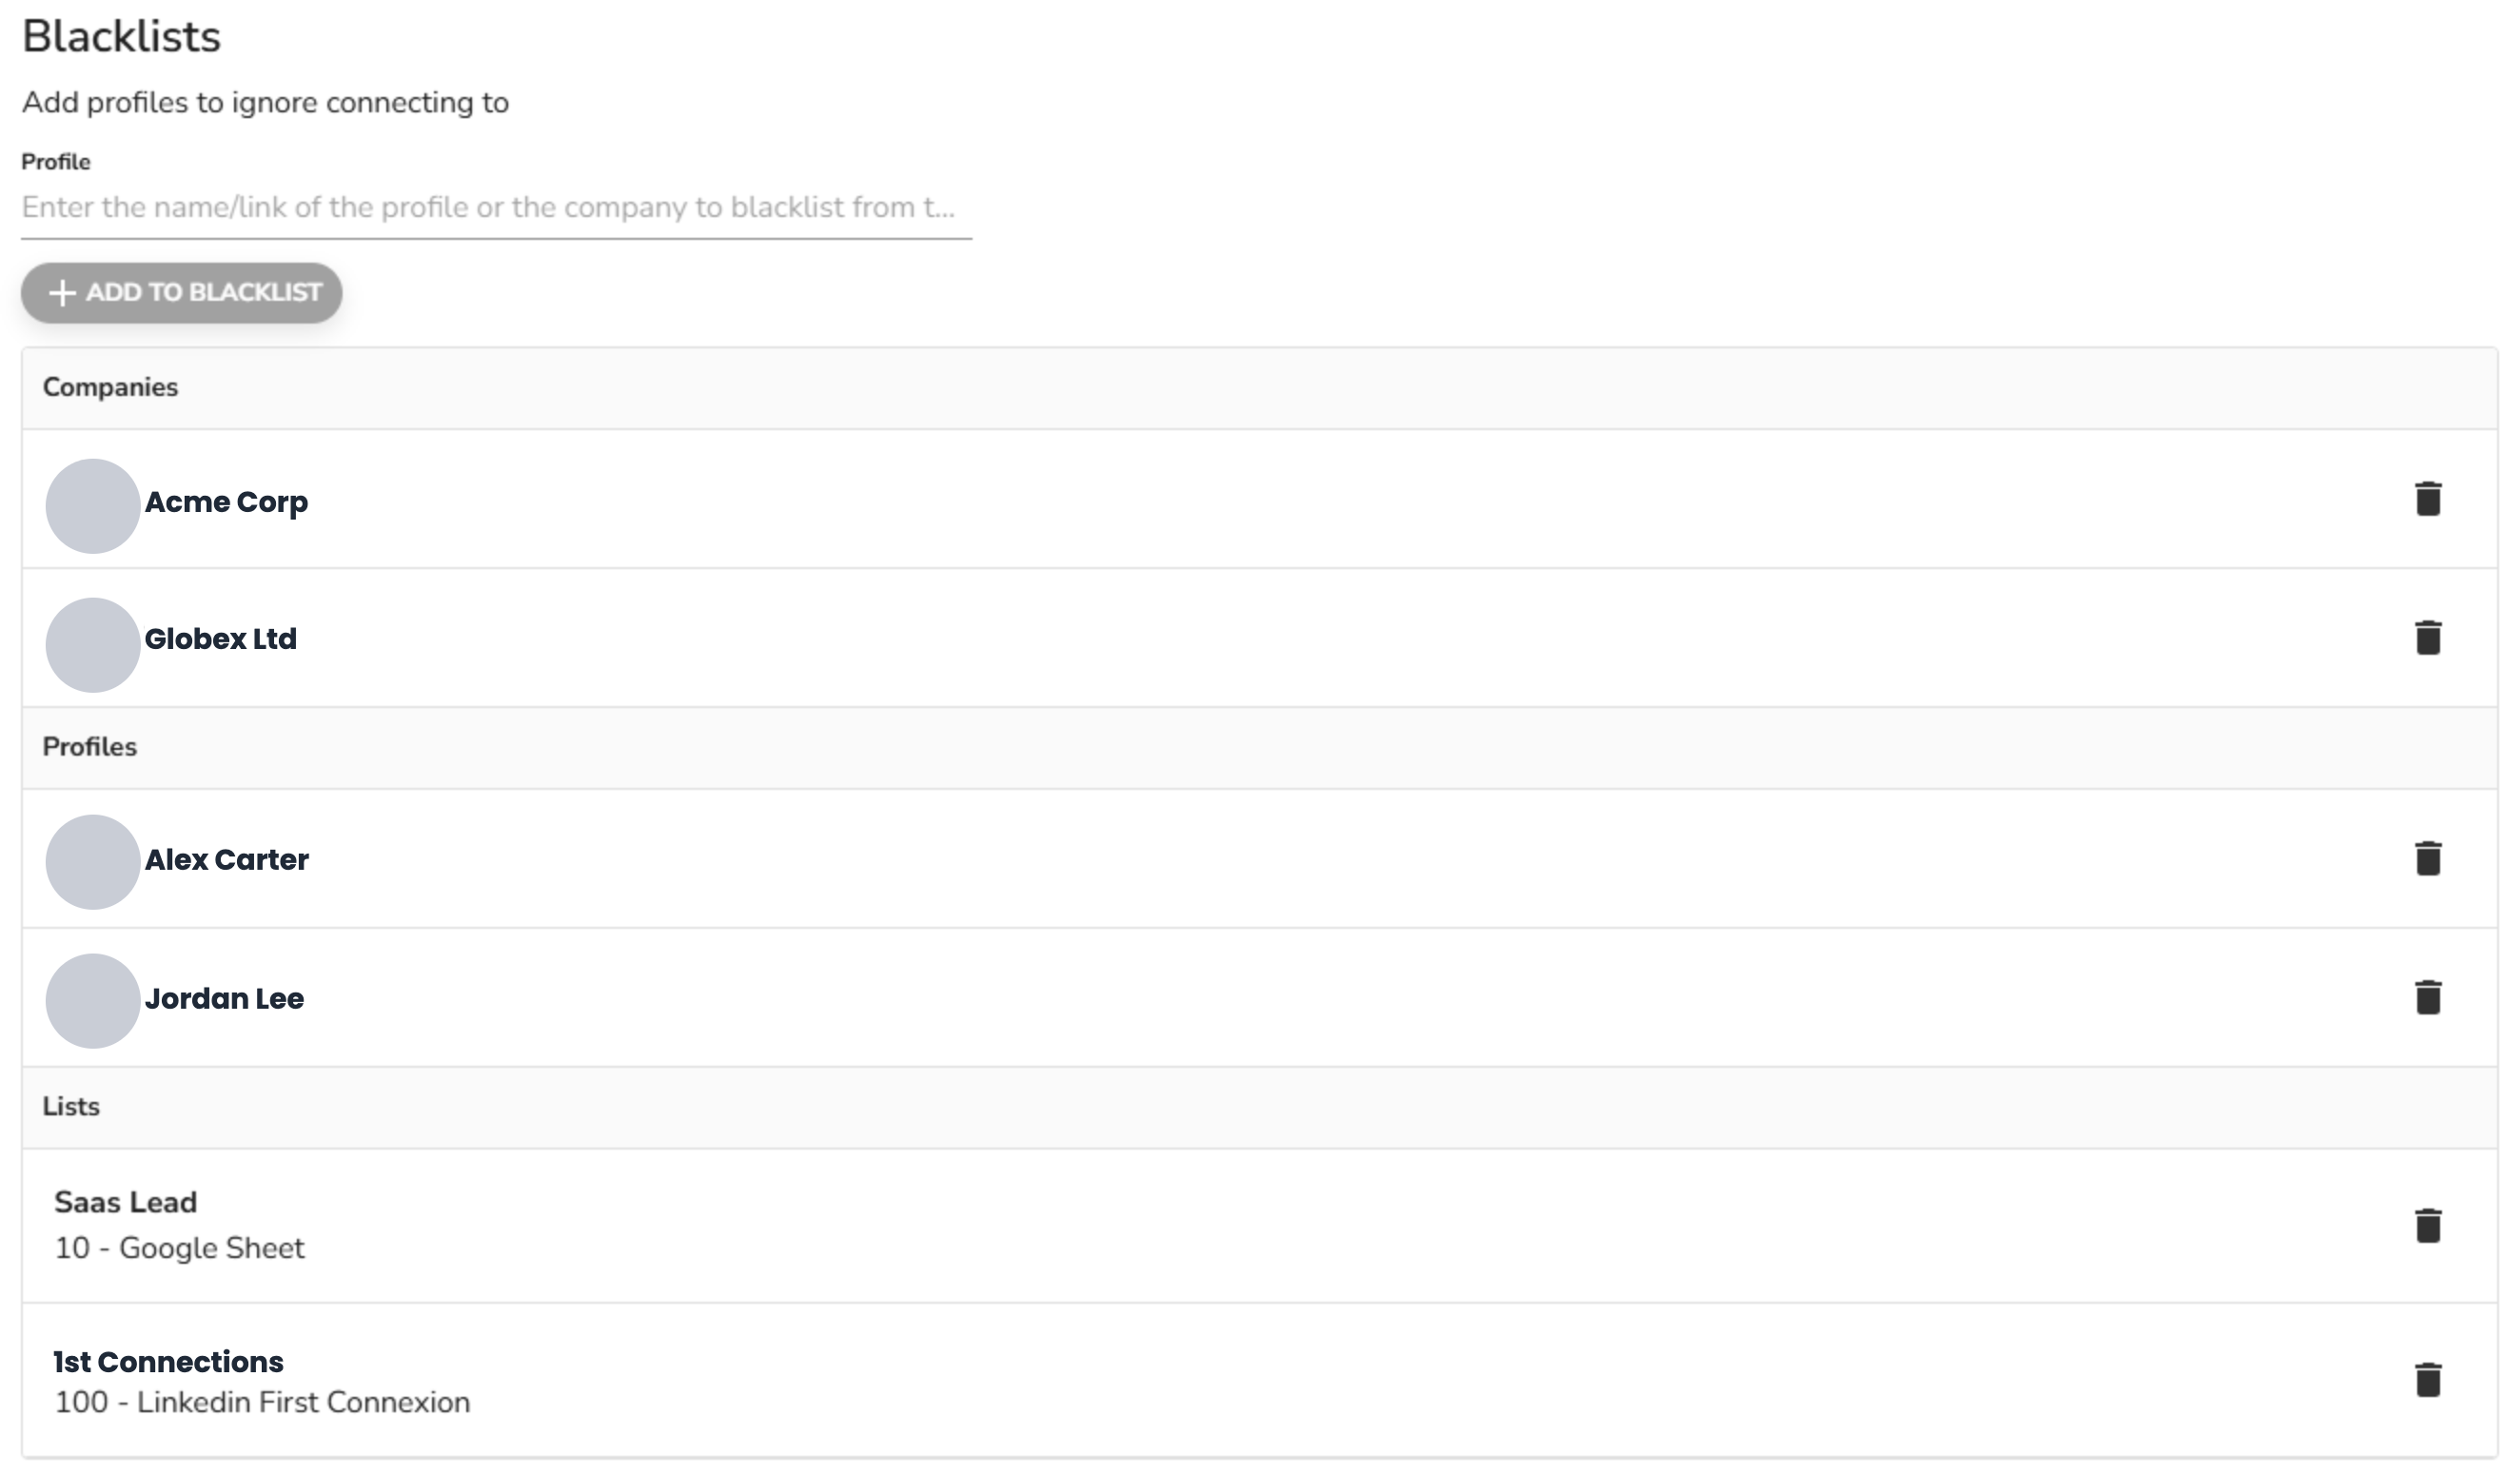
Blacklists let you exclude specific companies, profiles, or lead lists from your outreach so you only reach the right people. (The feature is still called Blacklist in the product; the action it performs is to exclude the people you add.)
What it does
- Exclude Companies: Block all profiles from a specific company.
- Exclude Profiles: Block individual LinkedIn profiles.
- Exclude Lead Lists: Block entire lists from being contacted.
How to configure
- Open Advanced Settings.
- Go to the Blacklists section.
- Add exclusions by specifying companies, profiles, or lead lists.
- Save.
💡 Tip: You can paste several company or profile URLs at once. Use LinkedIn profile or company URLs — not search-result links — and add them at the campaign, sender, or agent level (remember: only campaign-level entries are enforced).
Practical Walkthrough: Excluding a Competitor
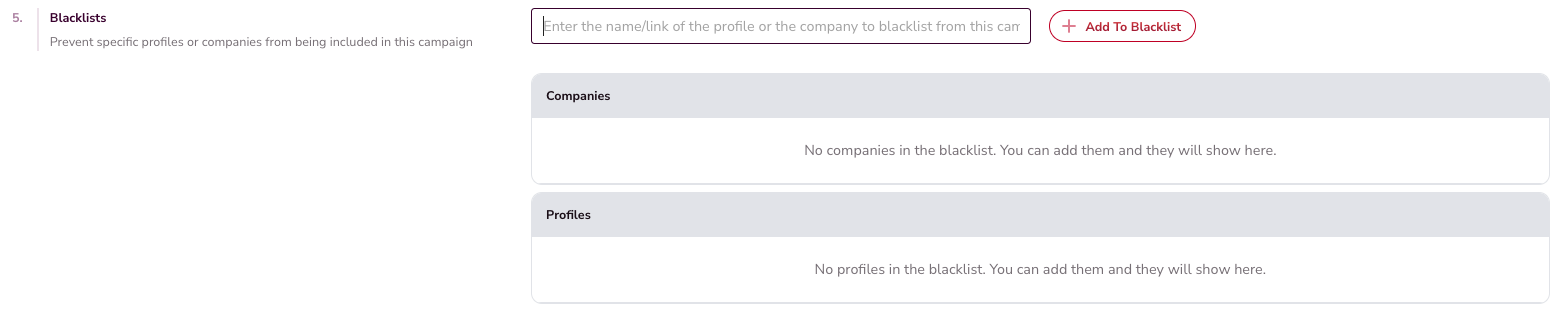
To exclude a competitor from being contacted:
- Add the competitor's company or profile link to your blacklist.
- Save the changes.
- Confirm the blacklist entry is attached to the campaign's outreach settings.
⚠️ Warning: Blacklist entries only take effect when applied at the campaign level. If a competitor is blacklisted at the Agent or Sender level but not inside the campaign settings, outreach will still go through to them.
Exclude Not a Fit
Every lead Leadvista AI finds gets a fit score. It measures how closely the lead matches your buyer persona. The score runs from 0 to 100. Exclude Not a Fit uses that score to keep the worst matches out of your outreach automatically.
What counts as "not a fit"
- A lead with a fit score of 0 is treated as "not a fit."
- Only a score of 0 is excluded. A low but non-zero score (say 20 or 40) is not excluded — those leads can still be contacted.
👉 In short: Very poor-fit leads are scored 0 and excluded; leads with any positive score are kept.
What the setting does
- With Exclude Not a Fit turned on, Leadvista AI still pulls zero-fit leads into your campaign and shows them in Activities.
- But it stops them before any message is sent.
- Seeing a zero-fit profile in Activities does not mean it was contacted. It was collected, scored, and then held back. The lead is marked "Not a fit," and its activity stops with a low-fit-score note.
Why "not a fit" leads still show in Activities
Leadvista AI finds and extracts leads first, then scores them for fit afterward. So a "not a fit" lead can appear in your Activities list even though it will never get a message. Leads that haven't been scored yet can show there too, while they wait to be scored. This is expected — the exclusion happens after extraction, right before sending.
Turning it on
- Open My Campaigns and pick your campaign.
- Go to the Settings tab.
- Open the Prospecting section.
- Turn on Exclude Not a Fit.
👉 Note: This is a campaign-level setting, so set it inside the campaign. Exclude Not a Fit is a feature-flagged control — if you don't see it on the Settings tab, it isn't enabled for your account yet. Contact support if you'd like it turned on.

Agent Duplicate Security
Off by default. Agent Duplicate Security is a toggle on the campaign Settings tab. It is available on every account — no special plan required.
What it does
Two separate duplicate-protection layers exist. They run independently:
Layer A — Always on, no toggle needed When a lead has already been contacted by the same LinkedIn sender in another campaign, Leadvista AI skips them automatically. "Contacted" means a message was actually sent — not just that the lead was added to a campaign. This protection runs regardless of whether Agent Duplicate Security is on or off.
Layer B — Agent-wide, requires the toggle When you turn Agent Duplicate Security on, protection expands to your whole agent. Any lead who has been contacted by any sender in your team is excluded — not just the same sender. The toggle is set per campaign, but the check covers all senders and campaigns under your agent.
Scope note: Layer A prevents the same sender from re-messaging a lead across your active campaigns. Layer B, when on, extends that protection across all senders in your agent and the campaigns you've previously run.
When to turn it on
Turn it on when you have multiple LinkedIn senders running outreach under the same agent and you want to make sure no lead gets the same campaign twice from two different senders.
Leave it off if you want each sender to work their own lead lists independently, or if you're deliberately re-approaching leads from a past campaign with a different sender.
How Layer A and Layer B interact
| Scenario | Layer A (always on) | Layer B (toggle ON) |
|---|---|---|
| Same sender, same lead, two campaigns | Skips the duplicate | Skips the duplicate |
| Different senders, same lead | Does NOT skip | Skips the duplicate |
| Lead from a past campaign, same sender | Skips | Skips |
| Lead from a past campaign, different sender | Does NOT skip | Skips |
Turning it on
- Open My Campaigns and pick your campaign.
- Go to the Settings tab.
- Turn on Agent Duplicate Security.
👉 Note: This is an on/off control on the campaign Settings tab. Unlike Exclude Not a Fit, it is available to all accounts.

Attach Settings
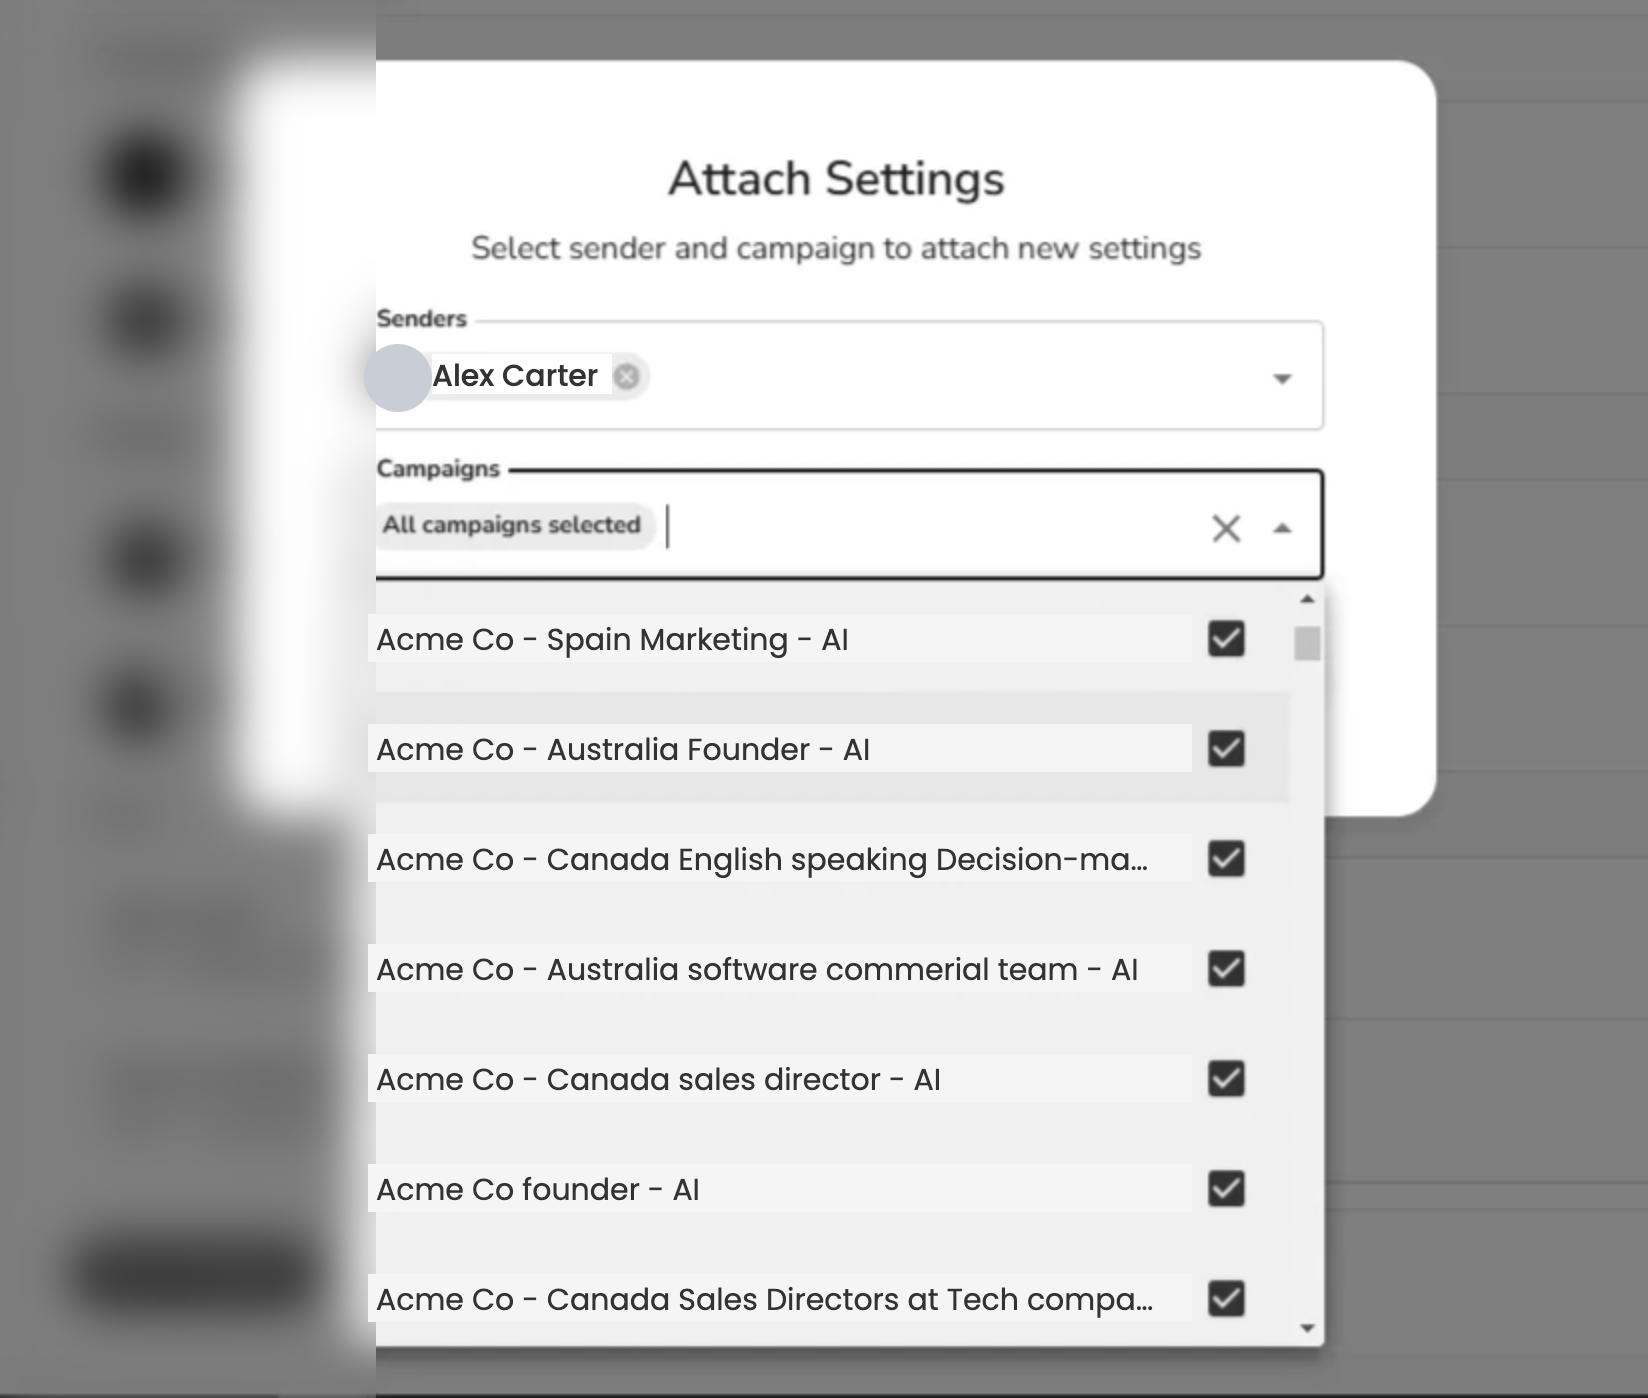
Attach Settings lets you apply a saved configuration to multiple campaigns at once, saving setup time and keeping things consistent.
👉 Note: This step is optional. You can skip it if you're configuring each campaign individually.
What it does
- Apply Blacklists, Active Times, or Inactive Days to multiple campaigns or senders in one action.
- Quickly push predefined settings to new campaigns.
- Push blacklist changes across all campaigns and senders at once for consistency.
How to configure
- Open Advanced Settings.
- Save changes in any feature (Blacklists, Inactive Days, or Active Time Settings).
- When prompted, select the campaigns or senders to receive the settings.
- Save.
How Settings Propagate
When you create a new campaign with a sender:
- The sender's settings are automatically applied to the campaign.
- If the sender has no settings, the campaign defaults to the agent's settings.
- You can also push blacklist changes across all campaigns and senders at once for consistency.
Key Takeaways
- Campaign settings exist at three levels (Agent → Sender → Campaign), but only campaign-level settings are enforced.
- Always verify that your blacklist entries (competitors, unwanted profiles) are included in the campaign itself.
- Use Inactive Days and Active Time Settings to make outreach feel timely and professional.
- Turn on Exclude Not a Fit to hold back zero-fit leads (if enabled for your account), and Agent Duplicate Security to reach each prospect only once across the agent.
- Use Attach Settings (bulk propagation) to keep settings consistent across campaigns and senders.
FAQ
The blacklist used to say "skip" and now says "exclude" — does it behave any differently? No. It's a wording change only. The feature is still called Blacklist; the action it performs — leaving the people you add out of your outreach — is now labelled exclude everywhere for clarity. Behavior is unchanged.
Can I add a single LinkedIn profile, a whole company, or an entire lead list to the Blacklist — and at which level? All three. Paste LinkedIn profile or company URLs (you can add several at once), or select a lead list. You can add entries at the campaign, sender, or agent level, but only entries applied at the campaign level actually stop outreach — so always confirm them inside the campaign.
Some leads aren't a fit for what I offer — how do I stop them from being contacted? Turn on Exclude Not a Fit on the campaign Settings → Prospecting section (if enabled for your account). Leads scored 0 for fit are collected and shown in Activities, then held back before any message is sent. Leads with any positive fit score are still contacted — for those, add them to the Blacklist instead.
Why is Leadvista AI messaging people who are already in my network or already my clients? Automatic exclusion of your existing 1st-degree connections only kicks in for sequences that start with a connection-request step. If your sequence has no connection-request touchpoint, it can message people you're already connected to. Add those accounts (or their company) to the Blacklist to be sure they're left out.
If I add the same person to two campaigns, will they get messaged twice? It depends on your settings. Leadvista AI always prevents the same LinkedIn sender from messaging someone twice across active campaigns — this protection is always on. To prevent any sender on your team from double-messaging the same lead across all your campaigns, turn on Agent Duplicate Security in the campaign's Settings tab. It's off by default.
I re-uploaded a lead list from a finished campaign. Will those people be contacted again? If Agent Duplicate Security is on, leads who were already messaged in a previous campaign will be skipped in the new one — even if the old campaign has ended. If it's off, the always-on per-sender protection still applies: the same sender won't re-message someone they already reached. To deliberately re-contact people from an old campaign with a different sender, turn Agent Duplicate Security off before uploading the list.
If I duplicate a campaign with leads, will people who weren't contacted in the original get messaged again from the start? Yes — leads who weren't contacted in the original are eligible to be reached in the duplicate. Leads who were already contacted are automatically skipped (same-sender protection). For a smooth handover, turn on Pause New Outreach on the original campaign first so any in-progress sequences can finish before you launch the duplicate.
What's the difference between Agent Duplicate Security and the other exclusion rules? Three separate rules exist — they work independently:
- Agent Duplicate Security (Settings tab toggle, off by default): prevents a lead from being messaged by any sender in your team once they've been contacted.
- 1st-degree connection exclusion: campaigns that start with a connection request automatically skip people already in your LinkedIn network.
- Exclusion list (formerly blacklist): manually exclude specific companies, people, or lead lists from any campaign.
Is the persona's include/exclude the same as the Blacklist? No. The Blacklist is a campaign-level exclusion of specific companies, profiles, or lists. A persona's include/exclude rules shape who the audience is in the first place (targeting logic). They're separate controls — use the Blacklist to remove known people from outreach, and the persona to define the audience.
What's Next
- See the full Campaign Creation: Step-By-Step Guide for a walkthrough that puts these settings in context.
- Read Your Agent: The Complete Guide to set sane Agent-level defaults.