
Prerequisites
- An active Leadvista AI account
- Access to Settings in your Leadvista AI dashboard
Step 1: Generate Your API Key
- Go to Leadvista AI API Settings (Settings > API tab).
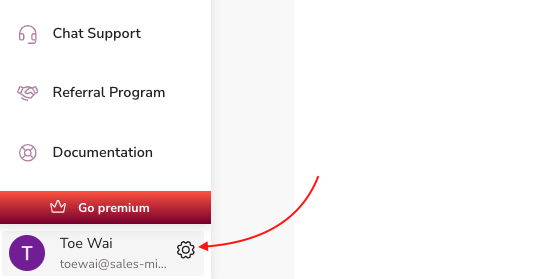
- Find the API Key section.
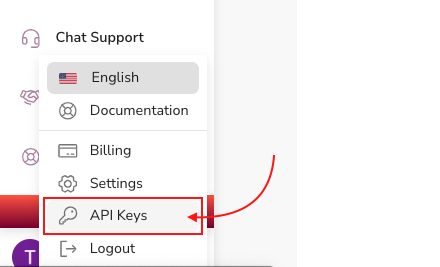
- Click Generate API Key.
- Copy the key — you'll need it in the next step.
💡 Tip: Store your API key somewhere safe. You won't be able to view it again after leaving the page.
Step 2: Authorize in the API Docs
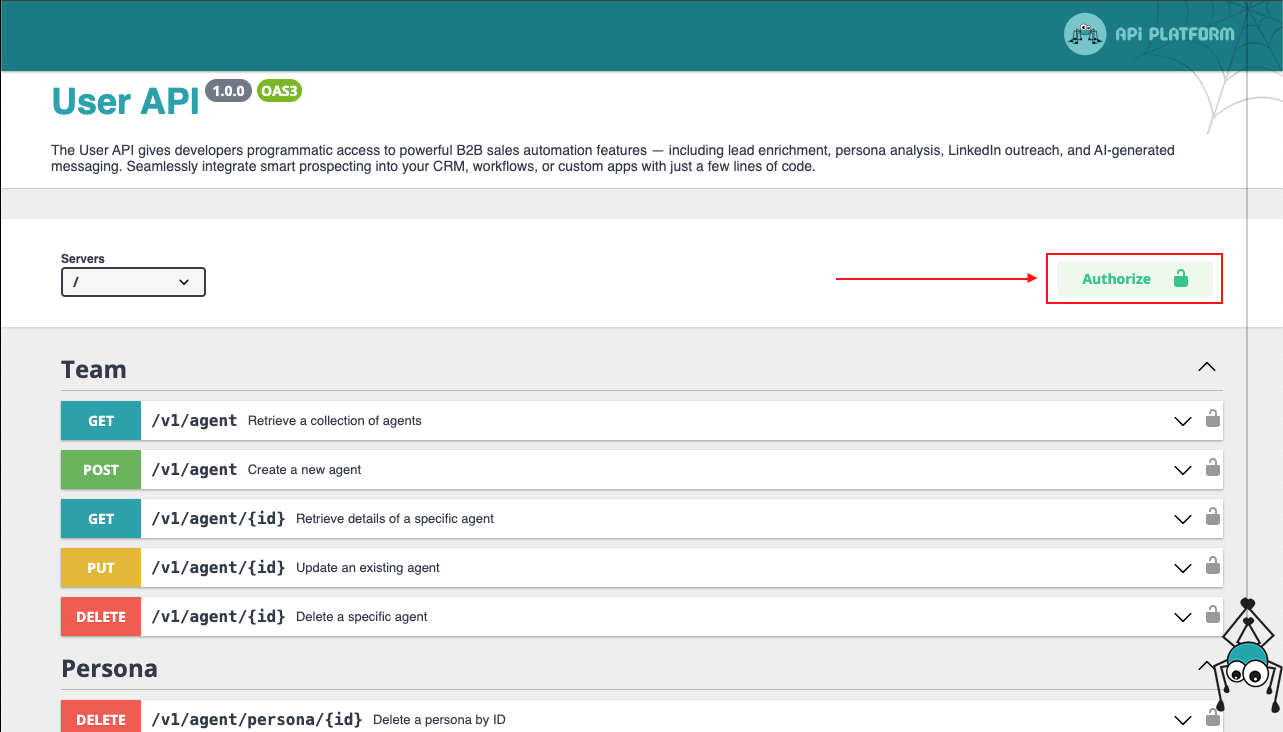
- Open the Leadvista AI API Documentation.
- Click Authorize at the top of the page.
- Paste your API key into the input field.
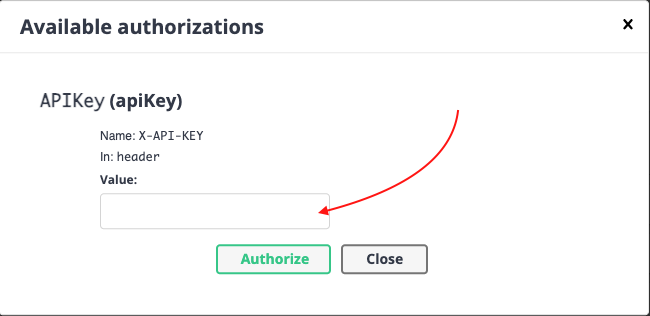
- Click Authorize, then Close the pop-up.
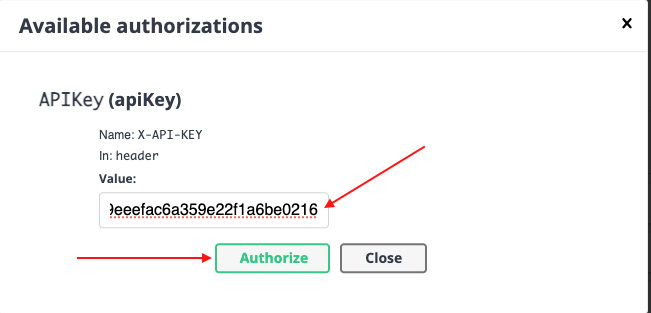
You're now authenticated and ready to make API calls.
Step 3: Make Your First API Request
Let's test with a GET request to retrieve your agents.
- In the API Docs, navigate to GET /v1/agent.
- Expand the request section.
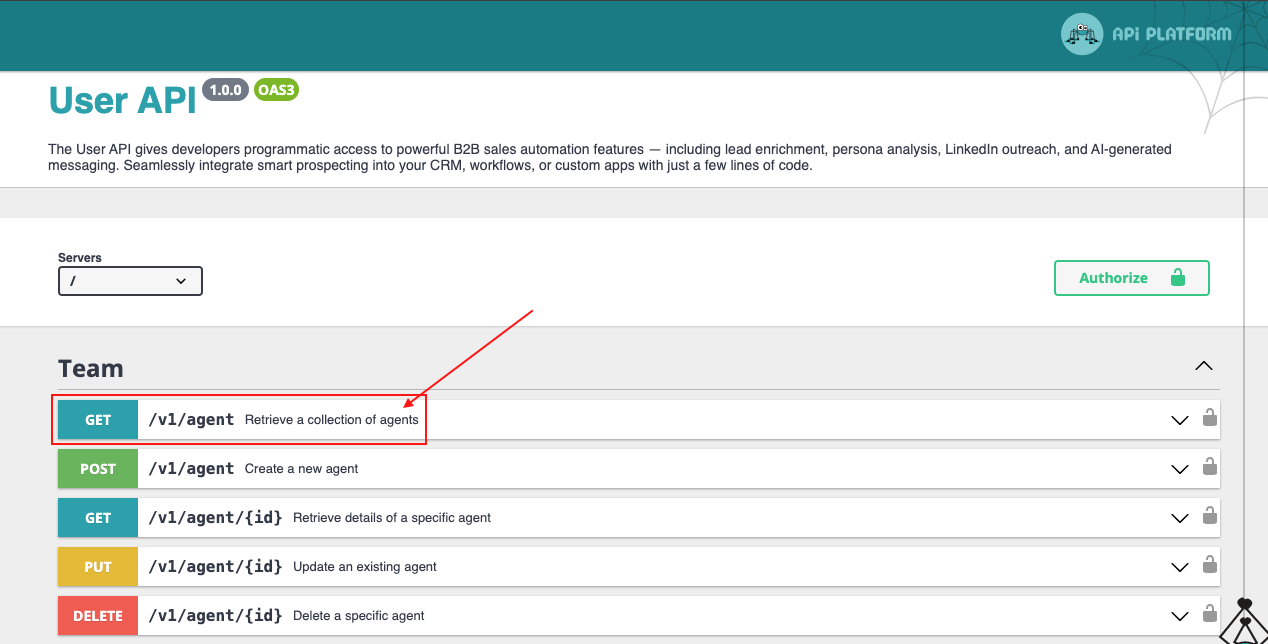
- Click Try it out.
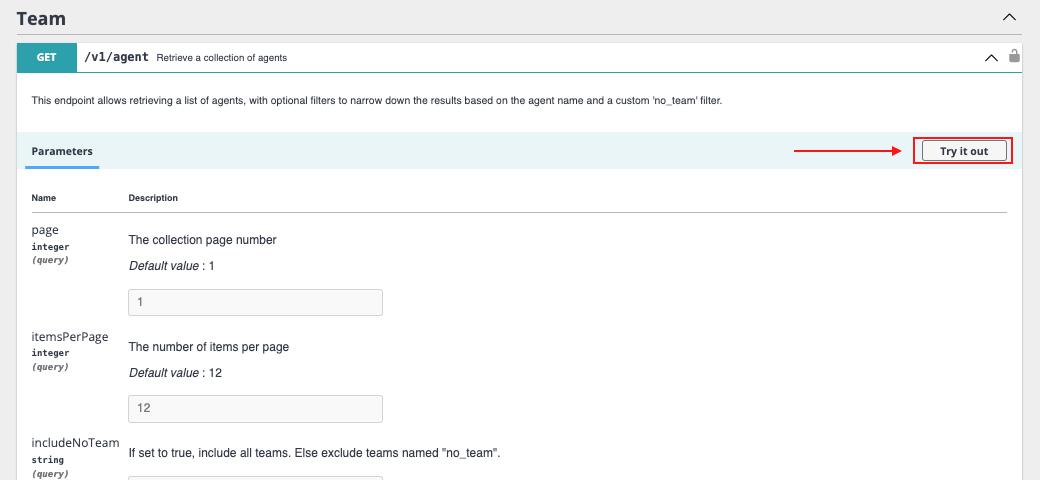
- Scroll down and click Execute.
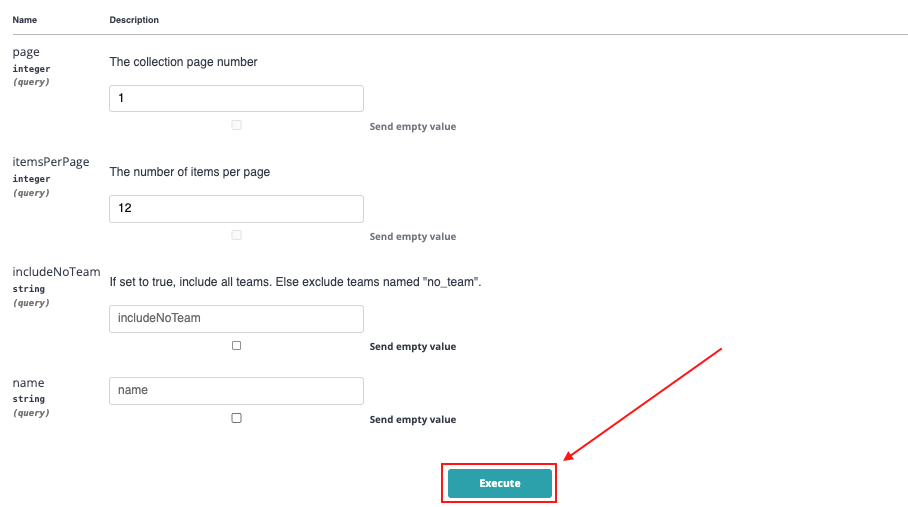
You'll see the cURL command and the response returned from the API. A successful response confirms your connection is working.
Step 4: Integrate and Automate
With API access confirmed, you can now:
- Explore other endpoints (leads, campaigns, sequences)
- Connect Leadvista AI to your CRM or internal tools
- Build automated workflows triggered by Leadvista AI events
👉 Note: Check the API docs for rate limits and pagination details before building production integrations.
Authentication and base URL
Send every request to the base URL https://leadvista-api.axionet.ai/. All public endpoints live under the /v1 path.
Authenticate with your API key in the X-API-KEY header — not a Bearer token. Add it to every request:
curl "https://leadvista-api.axionet.ai//v1/agent" \
  -H "X-API-KEY: your-api-key"
If the key is missing, wrong, or inactive, the API returns 401 Unauthorized.
Rate limits
The API allows 100 requests per 10 seconds. It's a sliding window, keyed by your X-API-KEY (or your IP address if no key is sent). Limits apply only to /v1 endpoints.
Every response includes rate-limit headers, in two families for compatibility:
| Header | Meaning |
|---|---|
X-RateLimit-Limit / RateLimit-Limit | Max requests allowed in the window |
X-RateLimit-Remaining / RateLimit-Remaining | Requests left in the current window |
X-RateLimit-Reset / RateLimit-Reset | Seconds until the window resets |
If you go over the limit, the API returns 429 Too Many Requests with a Retry-After header. Wait that many seconds, then retry.
Add leads to a lead list
Add leads straight into an existing lead list as JSON — no CSV upload needed.
Endpoint: POST https://leadvista-api.axionet.ai//v1/lead_list/{id}/leads
Send a JSON array of lead objects. Each object supports:
| Field | Required | Notes |
|---|---|---|
linkedInUrl | Yes | Rows without it are skipped |
firstName | No | |
lastName | No | |
phone | No | |
emails | No | Comma-separated string |
curl -X POST "https://leadvista-api.axionet.ai//v1/lead_list/123/leads" \
  -H "X-API-KEY: your-api-key" \
  -H "Content-Type: application/json" \
  -d '[{"linkedInUrl":"https://www.linkedin.com/in/jane-doe","firstName":"Jane","lastName":"Doe","emails":"jane@acme.com"}]'
How the import runs depends on how many valid leads you send:
- 1 lead or fewer: imported right away. You get
200with{received, imported, skipped}. - More than 1 lead: queued and processed in the background. You get
202with{received, queued, skipped}.
The import is additive and idempotent — it never removes existing leads, and it survives list refreshes. If your key does not own the list you get 403; if the list does not exist you get 404.
Manage your agents
Create and manage your agents (teams) through the /v1/agent endpoints.
| Method | Endpoint | Purpose |
|---|---|---|
| GET | https://leadvista-api.axionet.ai//v1/agent | List your agents |
| GET | https://leadvista-api.axionet.ai//v1/agent/{id} | Get one agent |
| POST | https://leadvista-api.axionet.ai//v1/agent | Create an agent |
| PUT | https://leadvista-api.axionet.ai//v1/agent/{id} | Update an agent |
| DELETE | https://leadvista-api.axionet.ai//v1/agent/{id} | Delete an agent |
Analytics endpoints
Pull conversation analytics scoped to a single agent, sender, or campaign. You pick the scope in the path — there is no groupBy parameter.
Each widget follows the pattern https://leadvista-api.axionet.ai//v1/{agent|sender|campaign}/{id}/…:
| Widget | Path suffix | Query params |
|---|---|---|
| Persona / fit-score distribution | /personas/distribution | from, to |
| Conversation funnel | /funnel | status[], from, to, tags[] |
| Messaging engine | /messaging-engine | status[], from, to |
Dates use ISO format. The messaging-engine window defaults to the last 7 days and is capped at 92 days. You get 403 if you are not a member of the agent that owns the scope.
curl "https://leadvista-api.axionet.ai//v1/agent/42/funnel?status[]=active&from=2026-08-01&to=2026-08-27" \
  -H "X-API-KEY: your-api-key"
What's Next
- Learn about the Autopilot and CRM features in Leadvista AI to understand what data you can pull via API
- Explore the Zapier integration if you prefer a no-code automation approach
FAQ
Do I use a Bearer token to authenticate?
No. Leadvista AI uses the X-API-KEY header. Put your API key there on every request.
What happens if I hit the rate limit?
You get a 429 response with a Retry-After header. Wait that many seconds, then send the request again.
Can I add leads without uploading a CSV?
Yes. Send a JSON array to POST https://leadvista-api.axionet.ai//v1/lead_list/{id}/leads. Each lead needs a linkedInUrl.
Why did my lead import return a 202 instead of a 200?
More than one lead imports in the background, so you get 202. A single lead imports right away and returns 200.
How do I group analytics by campaign?
Put the scope in the URL path, like /v1/campaign/{id}/funnel. There is no groupBy parameter.